
“Microsoft has revived its Flight Simulator series after more than a decade, promising gamers a replica of the entire globe to play on.” (BBC, 19 Aug 2020) [Video Date: 19 Aug 2020. Posted: 14 Sep 2020.]
Tag: software
Helpful apps for travel, hiking, and camping

Featured: South Africa If you’re planning on travel to Southern Africa, take a look at this Travooo resource: “Complete Travel Guide For Southern Africa“ RV Storage Lookup Our currently featured resource is the RV storage lookup on the Neighbor.com website. It’s a great searchable directory of places to store your RV, camper, tiny home, or… Continue reading Helpful apps for travel, hiking, and camping
Using Apple Photos Software on iPhone, iPad, and Apple Computers
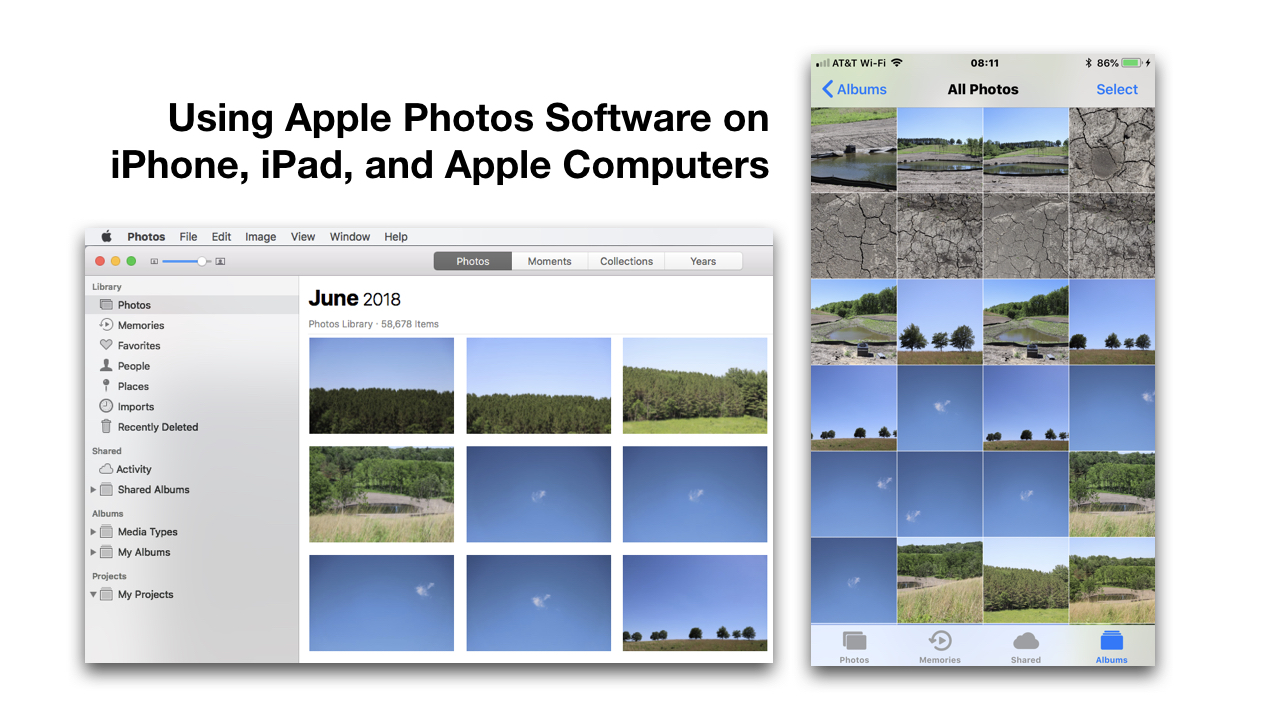
This document doesn’t offer a comprehensive look at how to use Photos software on Apple devices. Instead, an overview is offered. For in-depth support, visit https://support.apple.com/photos. If you’re having some synchronization issues, you can read our help document on that. All Photos and Moments View It’s important to know the difference between the “All Photos” display… Continue reading Using Apple Photos Software on iPhone, iPad, and Apple Computers
Enabling Updates for other Microsoft Products in Windows 7

Microsoft Windows is normally set to install updates automatically. However, on most computers those updates don’t include some important updates for other Microsoft components or third-party drivers. The following instructions describe how to enable all available updates. STEP 1 Go to Control Panel > System and Security > Windows Update. STEP 2 Click on the… Continue reading Enabling Updates for other Microsoft Products in Windows 7
Screen Capture Software – Jing, Screenflow, Camtasia Studio, iShowU, Snagit
Introduction There are several good screen capturing programs with varying degrees of sophistication. Some are optimized for creating instructional videos. Others are more simplistic. Here’s a short list with links to more details. Other than QuickTime, the following products are available for Apple or Windows users. QuickTime and iMovie (Free) For Apple users, using QuickTime… Continue reading Screen Capture Software – Jing, Screenflow, Camtasia Studio, iShowU, Snagit
Choosing DVD Authoring Software

Programs like DVD burning software aren’t widely in demand because for many years, Windows and Apple included DVD burning capabilities for free. The market of relatively inexpensive full-featured paid products is well established with Cyberlink, Nero, Pinnacle Studio, Roxio and many others. The free alternatives, available on reputable websites like CNET, mostly have 1-star to 3-star reviews, and likely offer very little support. So,… Continue reading Choosing DVD Authoring Software
SOFTWARE: Deciding Between Free Versus Paid Computer Programs and Apps
Technology Introduction A question that comes up often is whether to use free or paid software. It’s tempting to get something for free. This page helps provide a brief introduction to this topic. Legal Versus Illegal There are legitimate free products available, but there are also some commercial retail products being given away for free.… Continue reading SOFTWARE: Deciding Between Free Versus Paid Computer Programs and Apps
yWorks yEd is Free Flow-Chart, Workflow, Project Management, Network Design, Graphic Planning Software
Summary. The free yED Graph Editor software from yWorks is a a powerful desktop application that can be used to quickly and effectively generate high-quality diagrams. Create diagrams manually, or import your external data for analysis. The automatic layout algorithms arrange even large data sets with just the press of a button. [ yWorks yED Website | yWorks… Continue reading yWorks yEd is Free Flow-Chart, Workflow, Project Management, Network Design, Graphic Planning Software
Apple Mail Attachment Compatibility Issues and Problems with Embedding Attachments as Rich Text Content
Summary. Email client software programs such as Apple Mail, Microsoft Outlook, and Mozilla Thunderbird, have the ability to send email messages as unformatted text messages — without bold, italics, centering of text, or inserted pictures, for example. However, most people prefer to send messages as Rich Text or HTML to allow formatting and inserting of… Continue reading Apple Mail Attachment Compatibility Issues and Problems with Embedding Attachments as Rich Text Content
Peachtree Sage Accounting 2013 SR1 – Fix for Server Not Updated Error
Summary. The instructions below were previously what Peachtree technicians were advising as a resolution to this problem. However, as of 6 December 2012, there is a newer and easier resolution. Follow these steps to correct the problem of not being able to update your client workstations because the upgrade thinks the server hasn’t updated yet.… Continue reading Peachtree Sage Accounting 2013 SR1 – Fix for Server Not Updated Error
Tembo Apple File Search App with Advanced Searching Features – On Sale through 22 July 2012 at 6:00 PM CT
Technology > Apple Summary. The Spotlight feature included with the Apple OS is limited in its ability to selectively narrow searches based on file type and other factors. The Tembo app from Houdah Software provides advanced searching features while using the existing spotlight indexed database. When purchased from the Houdah store, the program normally costs $15,… Continue reading Tembo Apple File Search App with Advanced Searching Features – On Sale through 22 July 2012 at 6:00 PM CT
WARNING: Callpod Keeper Update Erases KeeperDesktop App Causing Users to Loose Access to Password Database
Technology > Apple Problem Summary. If you are a user of Callpod Keeper or KeeperDesktop secure password storage software for the Apple Mac OS X computer, you likely received an email today from Callpod indicating that an update is available. The instructions describe that you should download the update and copy it to your Applications… Continue reading WARNING: Callpod Keeper Update Erases KeeperDesktop App Causing Users to Loose Access to Password Database