
If you’ve enabled Amazon Photos feature on your Kindle Fire device, and turn on the Automatic Sync feature, and then login to Amazon to view your uploaded photos, you might be surprised to discover that none of your screenshots are there. The default setting on your device may not be configured to automatically upload screenshots. This creates a better user experience if you’re primarily interested in the photos you’ve taken yourself and not screenshots of things.
However, if you’re a heavy user of the screenshot feature and rely on those screenshots for future reference, you’ll want to make sure they are backed up to the Amazon Photos cloud and easily available online for convenient browsing.
The steps below will help you get setup. The screenshots are from a Kindle Fire (5th Generation).
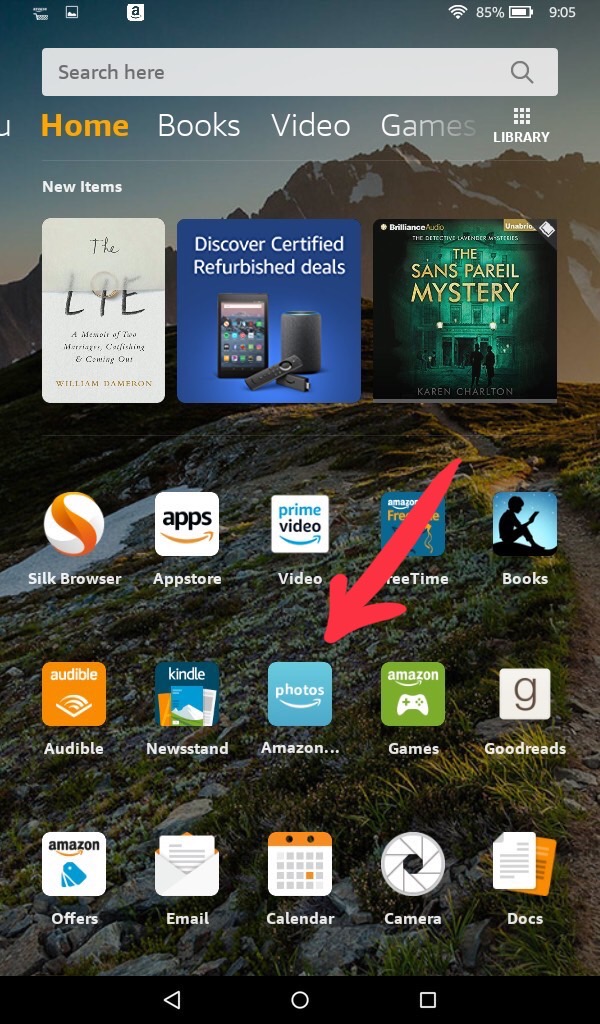
STEP #1 – Start the Amazon Photos App
Click on the Photos icon as shown below.
STEP #2 – The Amazon Photos App Will Load
You’ll see the Amazon Photos startup screen as shown below.

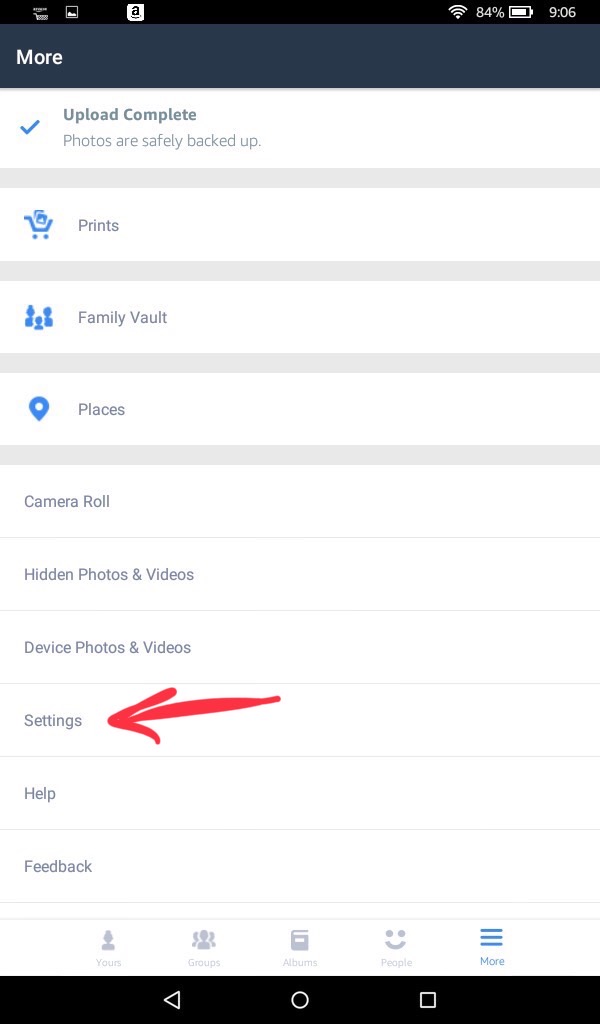
STEP #3 – Tap on the More Menu Option
Tap on the More menu option (three lines) in the lower right as shown below.

STEP #4 – Tap on Settings
Tap on the Settings option as shown below.
Step #5 – Tap on Auto-Save
Tap on the Auto-Save as shown below.

Step #6 – Tap on Manage Folders
Tap on Manage Folders as shown below.

STEP #7 – Select the Screenshots Folder
Select the Screenshots folder as shown below.

Now your screenshots should begin uploading to the Amazon Photos cloud storage where you can view, organize, download, and share them.
To view your photos, visit Amazon.com/photos